Wednesday, December 6, 2017

Storage Solutions for Mac Pro 5,1 Speed Tested

I have very recently acquired a new-to-me Mac Pro 5,1 and I have been tinkering with it quite a bit to optimize the machine's performance and get to know it before I write more long-winded and teary-eyed review. Part of that tinkering has been playing with different storage solutions to try and find something with contemporary performance. This effort has been trying because, as of the time of writing, Mac OS High Sierra doesn't seem to want to be installed on a software RAID disk, which is a problem for me because my boot drive and fastest storage option is exactly that. I am therefore looking for a single disk solution that will come close to my current drive without costing me an arm and a leg so I can swap my tired old ATI GPU (there's some nostalgia) for a shiny new AMD Radeon Polaris unit with native driver support. Mac Pro enthusiasts may be interested in my very unscientific but still useful real-world testing so you can make good choices about upgrading your own computers. 

First off let us start with the specs of my Mac:
Specs of my cheese grater. 


Next up is my boot drive, which is two 512GB SATA III SSDs mounted to a Sonnet Tempo PCIE card. The drives are a Samsung EVO 750 and a SanDisk SDXP480G. Not the best and brightest drives but they pull hard enough. 
Blackmagic disk speed test for sonnet tempo
My boot drive. 


Next up is a late 2013 Apple Samsung 128GB blade from a 13" MBP mounted on a PCIE adapter. The read speeds are fast but the write speeds could be better. From what I have read online, the larger drives are faster as there are more memory modules to write to simultaneously. I am trying to get my hands on a 512GB or 1TB blade but they are very expensive. 
Blackmagic disk speed test  for apple PCIE 2013 blade
A late 2013 Apple SSD.


I have also tried using a SATA III SSD in an 'off the shelf' Sedna PCIE-SATA adapter. The drive I tested was a  LITEON IT LCS-256L9S-HP. The results were fair but not what I was looking for. 
Blackmagic disk speed test  for SATA SSD ON PCIE ADAPTER
SATA III SSD in a PCIE Adapter
Another solution I have considered is the older MSATA based apple SSDs that were used from 2011 through early 2013. I have a 512GB unit kicking around but the 17+7 pin to SATA adapter I have ordered is too long and doesn't fit properly on the card. When I find my tin snips I am going to 'customize' the PCIE end bracket to make it fit and I will share the results. Should be faster than this.


As a point of comparison, here are three more traditional options that you would find on the desktop of your average media creator.

Up first is a pair of internal SATA III 7200RPM WD Blue drives paired in RAID 1. Yawn.
Blackmagic disk speed test for WD blue hard drive


Next is a portable USB 3.0 2.5" 5400RPM drive. Even worse.
Blackmagic disk speed test  for usb 3 protable drive.


And finally, an old Firewire 800 mini RAID with two 5400RPM 2.5" hard drives configured in RAID 1. Not suitable for anything but long-term storage.
Blackmagic disk speed test for firewire 800 raid.


So far none of these solutions are ideal so I will keep trying new things until I either find something or Apple updates High-Sierra to enable booting from an Apple software RAID. Don't forget to like, share, and leave your own Mac Pro or PC desktop internal storage solutions below in the comments.


Wednesday, March 2, 2016

To 7D or 7D Two?

For many years the Canon 7D has been the de facto choice for sports, action, and wildlife shooters in the Canon system who are on a budget. State of the art at the time of its release in 2009, it boasts build quality, weather sealing, video features, image quality, autofocus, and continuous shooting performance that is all still very relevant today. Now available for as little as $500 with a battery grip on the second hand market (at the time of writing), it is perhaps the best bargain in high-performance DRSLs.


With the arrival of the 7D Mark II in 2015 many have wondered or continue to wonder if the new camera is a worthwhile purchase relative to the original model. For reference, at present the new model retails for $1799 before tax and can be bought used for approximately $1500. I made the decision to upgrade to the Mark II and now, having owned and shot both cameras for a fair amount of time, hopefully I can help make that decision a little more clear for you.

Some might say I would be remiss for excluding the plucky 70D from this conversation and their criticisms would not be without merit. I have spent some time shooting with the 70D and it is a fine camera. Its specifications slot very nicely between the 7D and its successor. The reason I ultimately decided not include it in this discussion is because for many it is not a viable substitute for the 7D. The build quality and weather sealing of the 7D is in a different league from the 70D and the dual processors working in tandem with a larger buffer means the 7D cameras can sustain a high frame rate for a more meaningful length of time.

While penning this article the 70D's successor, the 80D, has been announced, bringing with it a whole slew of upgrades that further complicate the issue. Since this camera is not yet available on the market I cannot comment on it and will therefore exclude it from this discussion.


In my opinion, here are the 5 most important questions that you need to ask yourself to decide if the Mark II might be worth it for you:

1. Do you shoot a lot of video?  If you do, choosing the 7D Mark II over the original is really a no-brainer. The upgrades to the video feature set are perhaps the most significant and the reason that I upgraded. Canon's dual-pixel phase detection autofocus technology really is as good as everyone says it is and enables a total noob to shoot DSLR video in a variety of situations with good results. I love to take short videos while on vacation as well as to create the occasional vlogging-type content and with this camera I can get in-focus footage leaving the camera on a tripod or handing it to another person. Having a headphone jack means you can monitor the audio, which to me sounds slightly nicer in the new camera due to what seem like a better pre-amp for the input. For the serious hybrid shooter, the camera offers higher bitrate compression as well as a choice of frame rates including the elusive 1080/60. The footage seems a little nicer to me but it's not revolutionary. The major point to keep in mind is that the video specs are excellent for someone who primarily wants a high-performance DSLR for stills and also shoots some video. There are better video-focused cameras out there for at the price point of the 7D Mark II. If you intend to focus manually the original 7D is still a very capable video camera as well.

2. Do you need (and can you afford) dual card slots? No one can deny the many virtues of having two memory card slots in your camera, most important of which is making two copies of each photo for mission critical shooting occasions. If you aren't paying the bills with your camera, the importance of dual card slots becomes more debatable. The 7D Mark II has a CF and an SD card slot so depending on what camera you owned previously you may need to buy a whole new type of media to utilize both slots. To get the most out of your high-performance DSLR you need to buy the fastest cards available so that the dual Digic processors in the camera can efficiently write to the media and clear the buffer, preserving your ability to burst-capture. Upgrading to the Mark II means buying two expensive cards instead of one. In virtually all cameras with dual card slots the writing performance is limited by the speed of the slower card so there is no point in pairing faster cards with slower ones. As some food for thought, my completely unscientific testing tells me the difference between using a 600X and a 1000X card win the 7D Mark II is a whole second more of continuous shooting.

3. How often do you rely on the weather sealing of the camera in extreme conditions? The weather sealing of the 7D is very good and, paired with a weather sealed lens, I have used it in heavy snowstorms as well as light rain quite a few times without ill-effect to the camera. The Mark II supposedly employs weather sealing comparable to that of the 1D series cameras, which is a significant step up. The Lensrentals.com blog has a great article on just how good the weather sealing is on the 7D Mark II. Personally, I don't stay out long in heavy rain with my camera, but I do love to do street photography in the winter during heavy snowfalls. I found the weather sealing of the original to be sufficient for my purposes, but if you are hardcore with your outdoor photography you may benefit from more weather sealing. If you don't photograph in inclement weather at all or don't own weather sealed lenses this should make no difference to you at all.

4. Do you often shoot in low light or with teleconverters? Perhaps the most significant feature for telephoto shooters is the new camera's ability to autofocus using the center autofocus point with lens and teleconverter combinations with a maximum aperture of f/8. Such autofocus sensitivity was previously only available on 1D series cameras and represents a huge advantage in getting closer, especially for those on a budget. This means that the relatively affordable super telephoto staple lenses of the Canon system, namely the EF 100-400mm f/4.5-5.6L IS USM (original or version II), EF 300 f/4L IS USM, and EF 400mm f/5.6L, can be used with a 1.4X or a 2X teleconverter to achieve combinations capable of up to 600mm, which is effectively 960mm on the 7D. This magnificent dual cross-type center autofocus sensor also focuses down to -3EV (candle light) and focuses more confidently in reasonable low-light situations. If you shoot events or anywhere the light is often low this will be very useful to you. The autofocus sensor of of the original 7D is no slouch either. Its centre autofocus point is dual cross-type with lenses who's maximum aperture is f/2.8 or faster, providing capable autofocus in low light.

5. Do you see yourself using the advanced capabilities of the autofocus system of the new camera? There is no doubt that the autofocus system on the 7D Mark II is far more advanced than the system on the original camera. Not only does it have more than three times as many focus points, but it also inherits from the 1D series its very technical autofocus customization options and iTR tracking using the metering sensor. What you need to ask yourself is if you are willing to pay for the extra features. In this case more really is better and even if you do not currently use all the features of the new camera, you can grow to learn the more advanced features in time. On the other hand, if you find you can get good results with the very capable autofocus system on the 7D, you can save a lot of money over the Mark II.


There are of course many other advantages to the new camera versus the old but I personally don't find these as important as the points discussed above. 10 Frames per second versus 8 is not a meaningful difference for most outside of impressing your fellow photo geeks by holding the shutter down until you get weak in the knees. The bump in image quality with the new camera is itself not enough in my mind to justify upgrading. The image quality of the original 7D is in step with modern DSLRs, producing beautiful colours and very fine gradations in tones. In my opinion the noise performance of the Mark II is slightly improved, offering a marginally cleaner file at ISO 3200 than the original did at ISO 1600. I found noise performance of the original 7D to be quite good up to ISO 800, while 1600 was perfectly usable. Neither of these cameras are excellent when it comes to pushing RAW files more than approximately 1 stop, where shadow noise becomes a problem. There is some improvement in shadow noise and banding in the 7D Mark II, but it's nothing to write home about. GPS is useful to some and a non-issue to others. Neither camera has native wifi or a touch screen. The bottom line is that you can't go wrong with either camera if you are looking for a rugged APS-C body with a machine-gun burst rate.


Here are a few more useful links to research these two fine camera bodies:

Thursday, February 11, 2016

Made for Climbing

In an effort to spur myself to greater levels of creative output in 2016 I have committed myself to a 52-week project. For the uninitiated, a 52-week project is loosely defined as committing to make and post and image every week for a year. Because of my atrocious schedule I have limited my commitment to posting a new photo on my Flickr every week for the year in order to preserve the option to shoot and store images for those times when I know I will not be able to make images. This somewhat defeats the goal of the project, which is to force myself to make photographs regularly, but it is a step in the right direction.

This brings me to the subject of the article, a photo of a dirty old pair of boots that someone tossed out in a parking garage. I call this masterpiece 'These Boots.' There I was with my camera tucked in the bottom of my bag, on my way to the library with my partner for a study-date and desperately in need of a photo for my project. Emerging from my car I was immediately confronted with the sight of these sublime sabots. Their previous owner had perched them on an elevated ledge illuminated by a gorgeous mélange of different reflections from the various angled surfaces of the concrete parking structure. I decided that the play of light and textures will do for a filler shot and snapped a dozen or so images working the composition towards what you see here. Never would I have guessed that this would become my most successful image on Flickr to date, having over 9000 view, 233 favourites, and 15 comments at the time of this writing. Beyond the statistics, what made this significant to me is that this image was picked up by Flickr's algorithms and posted on the front page of the site, known to Flickr users as 'Explore.' This was the first time one of my images was so selected by the site for exhibition and, now having gone through it, I can share with you my experience should you wish to see one of your images similarly displayed.


A dirty old pair of boots in a parking garage.


Like every Internet popularity contest, there are pages upon pages of advice, rumours, discussions, and misdirection available with a quick Google search. Having observed my own image get selected and then having myself been inducted into 'invitation only' groups for those who have made it to Explore, I can share with you these important insights:

  • There are no human beings involved in the selection process. Explorer displays 500 images a day and Flickr users upload 5000 images a minute according to the latest stats. Suffice to say an algorithm is picking the photos.
  • The algorithm selecting the photos does not analyze the photo itself, but instead looks at how the community interacts with the photo. Do you ever wonder why some amazing photos are featured in Explore beside some less than stellar work? What matters is how many favourites and comments your photo generates within a certain timeframe from when it is uploaded. These, along with some other possibly less important interactions, make up what Flickr called an 'interestingness' score. If your image hits a certain percentile of interestingness within its eligible lifetime it is featured in Explore. This means there are two possible routes to being featured: produce phenomenal work and get it out in front of many viewers, or have tons of friends/followers on Flickr to support you in the popularity contest. Ideally you would do both but if you are, like me, trying to build a following you will have to rely more on the former. 
  • The number of likes and comments you need to be picked up on Explore is actually not very high. It will of course vary with what else is generating a buzz on that day but this photo was picked up after twenty-something favourites and less than half a dozen comments. If the number is so low, why is it that all the photos on explore have hundreds of favourites and dozens of comments? Once the photo gets displayed in Explore the exposure it gets is mind boggling, even if it's at the bottom of the page. This practically assures it will accumulate many more favourites and comments. 

How then, did I get the initial likes necessary to be picked up by Explore? The two most accessible sources of traffic to an image in my opinion are Flickr groups and social media. If you are a Flickr user hopefully you are already enjoying various Flickr groups. Flickr groups center around different things, be it a certain subject matter, a location, an aesthetic, a location, a community, a camera system, etc. In these groups users have access to streams of content curated by the group rules and its users. You should join and participate in as many groups as possible in order to post your own images in the appropriate groups. Be sure to actually participate in the groups as this is not only a great way to be inspired by others' images and interact with the community, but also to familiarize yourself with the group's tastes. Do not forget to spread a few favourites around yourself. They are free to you and they really inspire your fellow photographers to continue to hone their craft by showing them that their images are appreciated.

I may not be the greatest photographer on the planet but I have a university degree in marketing and worked as a teaching assistant and research assistant for years with my professor of e-marketing after my undergrad. Suffice to say I know how to promote my images well beyond my natural audience using social media. The aim of the game is to direct as much traffic to the image to fill your 'sales-funnel.' Of all the traffic you direct there, only a small portion will be Flickr users, so you need to generate significant numbers. It is worth bearing in mind that photographers are more likely to have Flickr accounts so anything you can do to specifically target them will yield a higher percentage of conversions. I use the following platforms, listed in order of importance according to my experience:

  • Facebook: Of course this is the big one. Depending on how you use Facebook you may be able to leverage a ton of reach. You will need to share the photo from Flickr's web page or ap. The trouble is that not everyone will click it, so it is worth adding a one liner to the post in Facebook asking people to click through and view the full image. Make sure you join photography groups so you can post your image there and drum up traffic that is more likely to want to view your work and have Flickr accounts.
  • Reddit: Reddit is either feast or famine. Your best bet here is to find a very specific niche subreddit that your image fits in. Posting in general image subs like r/pics, or photography related subs like r/itap or r/photocritique will likely see your post buried unless your picture contains cats or young women. The SFW Porn Network is a great place to start (I promise it is not what it sounds like) as it spans dozens of clearly defined topics and high quality images are generally appreciated. If you get this right you can generate tens of thousands of views in a very short time. 
  • Twitter: Twitter's popularity is waning a bit but there are still plenty of active users and if you already have a following or participate in the community you may be able to leverage it in order to drive traffic to your image. I try to mix photography-specific and non-photography hash tags to broaden the reach of my post. 
  • Pinterest: I am new at Pinterest but I have not been successful at leveraging it to drive traffic to Flickr yet. Come to think of it I have not been successful at doing much with Pinterest and I need to learn to use it more effectively. 
  • Instagram: For this purpose Instagram is useless. Flickr's mobile app offers an option to copy the image to Instagram but it does not link back. Post. Enjoy the love. That is all. 

Reading this you would think that I have this down to a science and I can repeatably and reliably propel my work to Flickr greatness. Unfortunately this is not the case and I have yet to repeat this success. What is important is that I am, like you, now aware of the formula. To me this is half the battle. Hopefully I will soon see your images on Explore if I have not already, and you will see mine.

Friday, January 15, 2016

Capturing Creativity - A Photoshoot with Brett Caron


For years I have been telling Brett Caron that he needs to freshen up his social media photos and to calendar some time with me for a shoot. Brett is a freelance writer, blogger, screenwriter, content whiz, and all around multi-talented creative professional with a huge personality that begs to be photographed. Coincidentally he is also a very close friend of mine, but that alone was not getting me on his schedule so a little persuasion was in order. In fact there was nothing wrong with his photos. They were actually quite good, but that truth was rather inconvenient when it came to getting him in front of my camera.

Brett had just come back from meeting with some game publishers in the U.S. where he was working on a deal to collaborate on a new role playing game source book as a contributing editor. He and I played many pen & paper style role playing games growing up and still do every now and again. Some of my favourites among Brett's creations are delightfully roguish characters who sow fear and folly with equal effect. Because each of these scoundrels captured some small part of Brett, when it came to photographing him I couldn't help but see some of these personalities overlaid on my vision.

Knowing that he had some publications coming up I wanted to get a 'book jacket' style high-key image on white seamless. We were working at Studio Cozy in Toronto where they have a vintage Norman pack and head strobe system with enough firepower to light high key backgrounds with ease. I asked Brett to repeat different motions that might be 'tells' one would express when bluffing, such as scratching his chin, fiddling with his glasses, or straightening the collar of his jacket. This technique, which I learned from Gina Milicia's So you Want to be a Photographer podcast, let me really hone in on the decisive moment since the motions were being repeated in a more or less predictable fashion. I was able to get quite a few cheeky and expressive images that were professional enough for a promo image of a writer yet really let the rogue shine through.


High-key portrait of writer Brett Caron scratching his face.


After working the white seamless for a while with a few different wardrobe variations I decided to do an about face and shoot on a black background for a darker and moodier low-key look. At first I went for a very traditional pose seated on a stool with hands in the lap. I love the strong expression which draws attention to the eyes and face. Hopefully you cannot tell too readily that this image was my first attempt at using frequency separation for retouching skin. During this setup I had repositioned my lights in such a way that I was having a tougher time getting enough side fill from the reflector on camera left so I flipped the board over from the white side to the silver side for the slight bump in reflective power. In the past I have worked with silver umbrella diffusers and they gave a more contrasty light that brought out textures much more than the white shoot-through variety and I was curious to see if the same was true of reflectors when the key light being reflected is was a big ol' soft box. 


Low-key portrait of writer Brett Caron  sitting on a stool.

After shooting a few images with the reflector flipped, I stopped to review them to find out my suspicions were confirmed. There was a clear difference in the quality of light coming off the reflector, especially in the parts of the face closest to the silvered surface. It was certainly more contrasty, but also surprisingly cooler than the source. After stopping to consider the effect for a moment, it seemed to me to evoked a sense of mystery, reminiscent of moonlight coming through an open door or window. 

With this happy discovery, formal style went out the window and I repositioned my strobes for side lighting coming from just slightly behind Brett, reflected off the silver board on camera left and filed with a small umbrella on axis. I wanted to exaggerate the contrast between the key and the reflector as much as possible while adding a dark shadow down the centre of the face to impart a sinister quality. Brett has a knack for writing compelling bad guys and I felt this lighting really gave the photos a big-screen scoundrel sort of look. Needless to say we had a lot of fun working this setup and I feel we got some great images. 


Low-key portrait of writer Brett Caron framing his face with his hands.


Low-key portrait of writer Brett Caron bearing his teeth.


While I find it important to concentrate one the fundamentals during a shoot to make sure I am meeting my own technical quality standards, experimentation is what really gives me inspiration. Going forward I feel I will focus a bit less on (over)planning the technical aspects and spend a little more time dedicated to working out the looks and exercises I want to focus on ahead of time. It was truly a riot to shoot with Brett and I can say with certainty that interesting images is an order of magnitude easier when you put someone interesting in front of your camera. 

To find out more about Brett and his work check out www.rottencrab.com


PS. On this photo shoot I discovered that a Canon EOS 7D Mark II can almost pull off a complete flash sync at 1/320. The shutter won't be visible in the shot but there will be a a slight yet not opaque dark gradation in the very bottom of the frame. It could come in handy if you really need the extra speed and are willing to recover it in post. 


Sunday, March 1, 2015

The Most Tragic Bargain Canon Full-Frame Zoom Lens

Canon EOS shooters will note that until very recently there was only one full-frame zoom lens in the current lineup outside of the L collection and that lens was the venerable Canon EF 28-135mm f/3.5-5.6 IS USM. 


To the uninitiated this seems like an incredible value in a lens, especially given the current used prices which at time of writing hover around $200-$250 for a clean copy. It pulls together a very attractive list of features, discussed here in brief:

  • The relatively large zoom ratio is extremely useful and unusual for a full-frame lens. Wide on the wide end and long at the tele end, it makes for a spectacular walk around all-purpose lens. 28mm can pull in vast landscapes from the correct vantage point and show rich environments for portraits. 135mm offers a lot of compression for manipulating backgrounds and perspective for portraiture. 
  • Image stabilization partially offsets the slower aperture and cuts the shake in video capture. Despite being the first generation system it works very well.
  • The USM focus motor offers fast full time manual focusing which was rare for a lens in this class until the recent proliferation of focus-by-wire STM lenses. The large rubberized zoom ring feels excellent during use and the focal leng increments are more evenly distributed than those in comparable models. 
  • One aspherical element is present in the optical design which, again, was rare for an lens in this class until recently. It's not the sharpest lens, especially in the corners, but it's not a total dog either. Stopped down a little it can do the business, which is impressive considering the age of the optical design which dates back to 1998. 
  • The unit is lightweight compared to many of the other available full-frame zooms. 

It's not hard to understand why many new full frame Canon shooters give this lens a try. I've seen many copies mounted to cameras on the streets and at events at home and abroad. This was the second lens I purchased to use on my 5DII and it spent a lot of time mounted to my camera. It was usually the first lens in my bag and the one that usually stayed on in case I needed to pull out the camera at a moments notice to capture an image or a video. I loved this lens. It had a few nagging issues such as comparatively flat colour and incredibly noisy IS (it sounded like I had a lawnmower in the lens barrel) but they didn't bother me much at that point in my photography and it bore me many beautiful images and videos. As in many love stories, fate awaited me just around the corner to show me the depths of my own ignorance.


In the summer of 2014 I found myself packing my bags for a much needed trip to Europe and the EF 28-135mm f/3.5-5.6 IS USM secured a spot in my camera bag along with my EF 50mm f/1.8 II and my recently acquired EF 100mm f/2.8L IS USM Macro. Now let me just say that when I'm on vacation I tend to walk a lot. I mean A LOT. Eight to twelve hours a day isn't unusual, and my camera is hanging from my sling strap for a good portion of that time. My partner has impressed on me the value of walking the streets to get where I want to go in order to really get to know a city. I've whole-heartedly embraced this philosophy as it bears fruit in both the enjoyment of my travels and in photographic opportunities. Considering I spend the the balance of my time eating and drinking, it's also a good way to offset the calorie intake. Walking up and down the steep hillside that sketches the Pest side of the Hungarian capital, I first began to notice the zoom creep that plagues this lens. My copy had never given me much trouble before then but the jarring of each step seemed to loosen the inner barrel a little more. Hunting for shots up and down the mountainside it quickly became apparent to me that the tension was now completely gone in the zoom mechanism and the inner barrel fell to full extension each time the camera tilted downward, pulled earthbound by the heavy front element. 

Let me preface the following by stating that the build quality of this lens had never before seemed problematic to me. The sturdy plastics and smooth mechanism felt much more rhobust than many of the later consumer lenses in the Canon range. There was some wobble in the inner barrel but nothing that I considered a cause for concern. The new found zoom creep, while unsettling, didn't imediatly raise alarm bells. It is an older lens after all, and was purchased second hand from an older gentleman who had loved it well for several years. I continued to treck on with the occasional knock of the lens bottoming out, searching for the perfect vantage point to shoot Buda set against the Danube.  

At one point I raised my camera to my eye to frame a shot and I was alarmed by the sound of a distinct and frantic rattle within the lens that I can only liken to that of a spray paint can. My shock turned to horror when I turned the zoom ring and perceived no change to the focal length in the viewfinder. After a deluge of oaths and a brief inspection I had surmised that the mechanism connecting the different segments of the inner barrel to the zoom ring had somehow failed and left me with an impromptu challenge to shoot the rest of my travels with the 50mm and 100mm focal length (hmmm...sounds like another blog post.) 

Fast forward almost a month, 1400 images and almost 60 minutes of video later, I was home and eager to tear down the lens and find out why my lens love had so tragically ended her life on our European getaway. I took to the Internet to try and find a tear down guide and was quickly confronted with the disconcerting reality that I was far from being one of the few unlucky owners of this lens who experienced this failure. Indeed, the prevailing discussions online  seemed to suggest that this is an inherent design flaw in the lens and that this failure is extremely common. Being someone who meticulously researches my purchases online for hours before buying anything I was shocked that this little tidbit of information had not surfaced in any of my research.

Luckily I was able to find an exploded parts diagram of the lens and a few tear down posts that helped me open up the lens. Now is a good time to mention that I had never taken apart a lens before and doing so is not for the faint of heart. The only reasons I did was because I had already written off the lens as the cost of sending it for repair would be nearly more than the current value of the lens. After carefully taking apart the lens my suspicions were confirmed; the guide pin (YA2-3139, if anyone is curious) that runs in the channels at the rear of the inner lens barrels to coordinate their movements had rattled loose and eventually fallen off from the repeated impacts of the lens bottoming out. It is secured in place by two microscopic screws (XA1-3170-259.) I'm not sure who thought that was a good idea but I'm sure they probably no longer work at Canon for exactly that reason. At that moment I also realized I no longer had in my possession those two screws which I needed to reinstall the pin and set my lens to right. I quick call to Canon secured me 4 of them, but I must warn the hopeful reader that even those 4 screws had to come from japan and the parts rep informed me that the part was discontinued and I was lucky to be able to even get them. I doubt they will be available for much longer, if at all. My lens now sits on my shelf beside a bag of rare screws, waiting for its next turn on the operating table.

Now seems like a good time to resume some of the negative aspects of the EF 28-135mm f/3.5-5.6 IS USM, minor as they may be:

  • The lens produces noticeable distortion at both ends. This is easily corrected in post, but results in some loss of critical sharpness. If you were worried about critical sharpness however, you would not be using this lens. 
  • The colours and contrast are not as nice as many other lenses. Not a huge issue but still noticeable. 
  • The IS is not as sophisticated and noisier than some of the newer systems. On start up it jumps, shifting the frame momentarily before settling back into its place of origin. This is so brief and predictable that I never found it to be much of a problem but some find it distracting. 
  • The variable aperture is fairly slow, particularly at the tele end. Inconsistent aperture is also a problem if you plan to zoom the lens during video capture, where you will experience a change in the exposure of the video.

In my eyes the benefits of this lens, design flaw aside, far outweigh the drawbacks at the given price point. However, due to this lens' propensity for mechanical failure I cannot recommend that anyone buy it. The failure of this lens hamstrung me in such a vulnerable situation which, while not statistically relevant, left a terrible taste in my mouth.

A beautiful redhead has now taken the place of my old EF 28-135mm f/3.5-5.6 IS USM and I couldn't be happier. The optical and mechanical performance is superior in every way and I picked up a used copy for less than double what I paid for the old lens. It's worth noting that since the EF 24-105mm f/4L IS USM and the EF 24-70mm f/4L IS USM are bundled in kits with Canon's full frame cameras there is an abundance of copies in the secondhand market and you can negotiate very aggressively (i.e. low ball) the multitude of sellers until one cracks. I've seen both go for as low as $600. The new Tamron SP 24-70 f/2.8 DI VC USD and the celebrated Canon EF 24-70mm f/2.8L USM can be picked up used for $800-$900 at the time of writing.


Here is a collection of further reading on this lens if you want to learn more about it:


If you would like to see some images taken with this lens please head over to my Flickr page.


Images

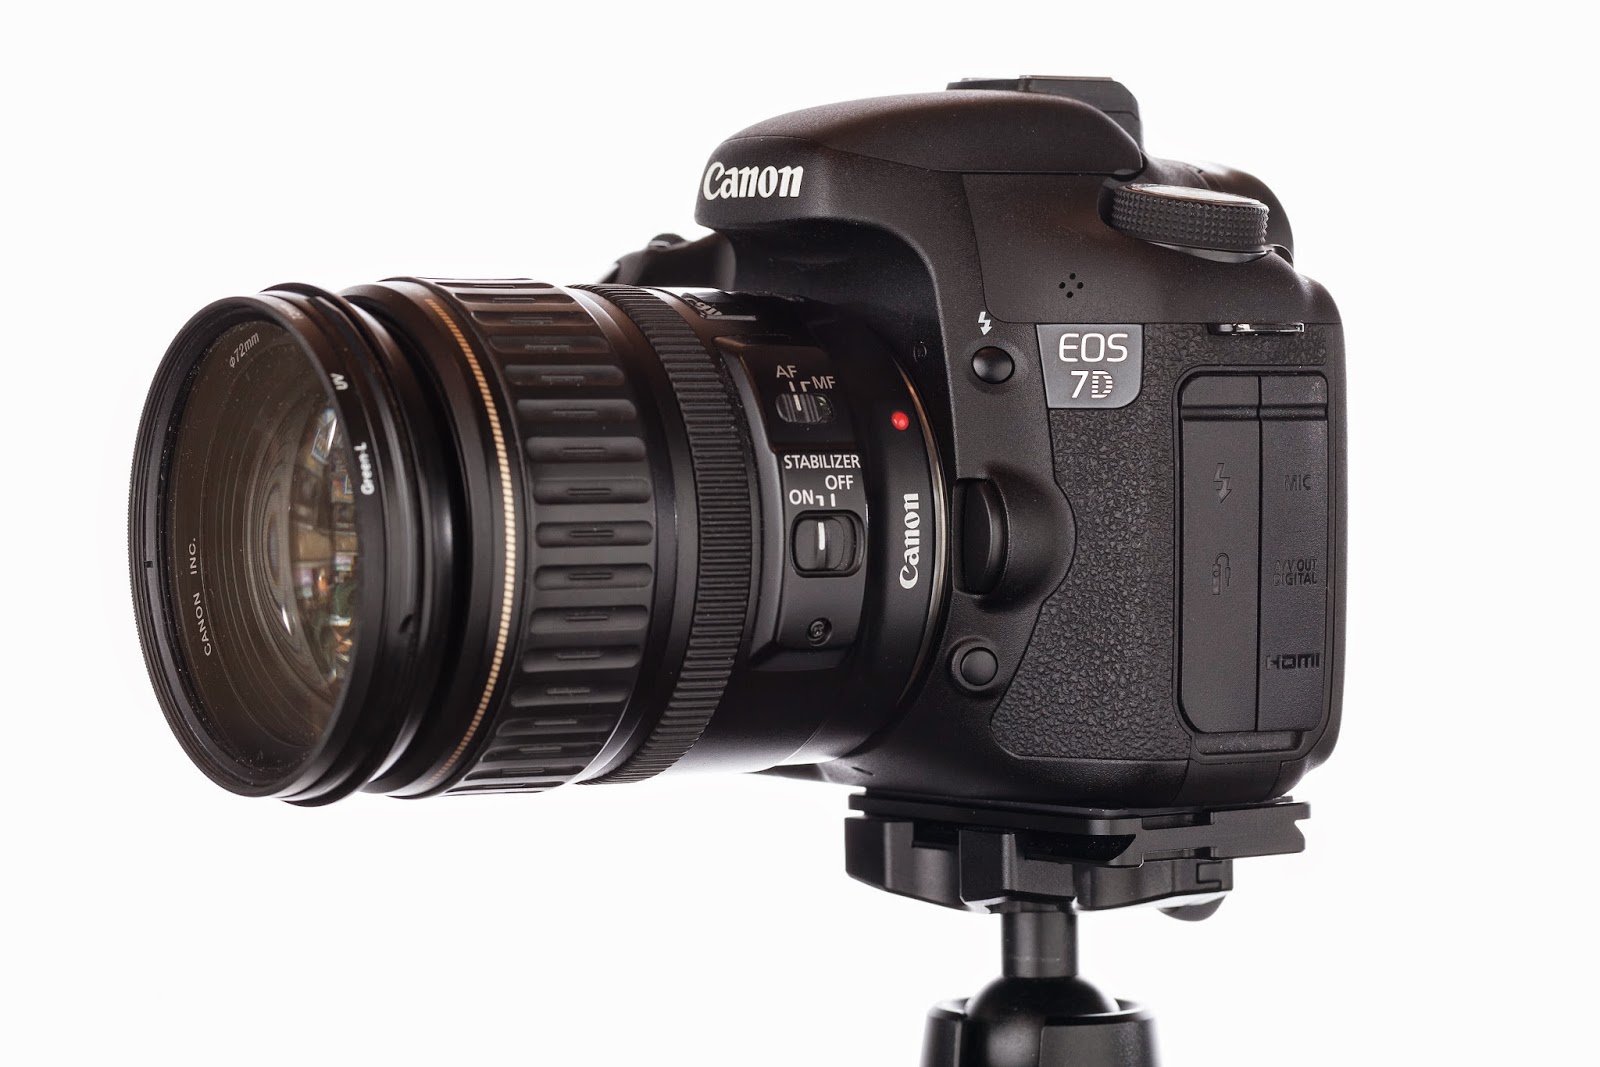
Here are some images of the shoot I did for this post. If you read my previous post about evolving product photography at home, you may have noticed that I've put into practice some of the ideas I derived from my last product shoot. Upon reviewing my images from this shoot I noticed my challenge was controlling reflections on the many shiny surfaces of the camera which I believe I can attribute to the lights being to close to the subject and having such prevalent hot spots despite the umbrellas and the diffusion flaps on the speedlites being down. Something to work on for next time.


Wednesday, February 4, 2015

Evolving Product Photography at Home


I buy and sell a lot second hand through the use of online classified sites such as Kijiji and Craigslist. It's a great way to save money on a variety of goods and this is especially true of photographic equipment. Photographers are constantly buying and selling equipment which creates excellent opportunities to acquire this expensive gear at lower prices. Selling your own equipment is also a great way of financing future purchases or downsizing your equipment collection when it become overwhelming. Part of being successful in selling your possessions online is taking good pictures of the items you are selling. Good pictures allow the potential buyer to asses the item more clearly thereby creating confidence in him or her. Done right, good pictures can also make the item look more appealing and create a sense of desire in the buyer. There is of course a natural overlap with my love of photography in creating images of items I wish to sell so I approached photographing my latest batch of sale items as an exercise in product photography, my experience of which I will share with you.


Concept and Setup

The latest batch of unwanted possessions I planned to photograph was a collection of old watches and a ball head, all of which were small items that I could photograph on a tabletop or similar surface. Still buzzing off the high of my recent high-key photo shoot I decided that a white backdrop would make my photos look simple and elegant while enabling me to apply some of the same approaches and technique I developed at my recent shoot. I recalled a few sheets of flexible poster paper I had used in a previous attempt at product photography and decided that would be the backdrop I would build my setup around, curving it to create the seamless effect between the surface I was shooting on and the background. I used a foldable workbench as a table and deployed it up against a shelf I could tape the backdrop to in order to keep it in place. For this I used masking tape so that it wouldn't damage the paper when removed.

To light the shoot I set up a speedlite on ball head style bracket fitted with a shoot-through umbrella on either side of the set to provide even soft light from all around for both the backdrop and the subject. To fill in any shadows I hung a third speedite above the set from my Gorillapod Focus with a 12" softbox attached. Two speedlites were set as optical slaves and one was triggered using an inexpensive Cactus V2 radio slave. Being the first time using strobes for product photography, this setup seemed like it would light the subject evenly while overexposing the highly reflective glossy white background.

My camera and lens combo of choice for this shoot was my 100mm f/2.8L IS Macro mounted on my EOS 7D. I chose the macro lens for its close focusing ability and biting sharpness, both ideal for bringing out the fine detail in the sale items. I chose to use my 7D over my other DSLRs because it has more autofocus points and can select a smaller sub-sampling of a given autofocus point on which to focus, allowing for even finer control when focusing on fine detail. Besides the autofocus capabilities I also chose the 7D to leverage the crop factor in order to get in closer to the subject from a greater working distance, giving my 100mm macro lens an effective focal length of 160mm. The camera sat on top of my tripod and was triggered by a generic remote trigger I picked up from Amazon for about $10. The setup looked like like this:


The umbrella on the left side was removed to better display the setup.


The Gorillapod Focus doubles as a very versatile speedlite mount using the foot stand that comes with the flash and the small QR plate supplied with the Ballhead X. 


Shoot and Refinement

As I might have easily foreseen, my first strobe setup for product photography didn't work out. I found out after this shoot that achieving that high-key look on a white backdrop requires you to overexpose your background by +2 to +3 EVs over your subject (1). That is simply not possible using the same lights to illuminate the subject and the background. With the setup described above, the subject was slightly overexposed and I was getting shadows around and behind the item where the surface curled into the backdrop. I also failed to account for the fact that the items I was shooting were mostly metal and glass, both highly reflective, and I could see my light sources reflected on several surfaces as specular highlights. Suffice to say my initial results were not ideal.

Don't forget to use sandbags on your light stands. 
I began to rethink my setup and stripped the umbrellas off the backdrop lights and put on some home-made flags with the intent of lighting the backdrop with direct blasts of the speedlites. I moved both very close to the subject, angled in such a was as the flag would block the subject from direct exposure from the flashes. I then set up two white foam core boards on either side of the setup to reflect diffuse light back on subject from either side. The boards acted as large light sources and wrapped the light spilling off the flash and the inside of the flag (intentionally made of white cardboard) back on the subject in a nice wrap. I then changed the orientation of the overhead softbox to come in from a lower angle and provide more lighting to the foreground. It took a considerable amount of trial and error to position all the flashes and the angles of the reflectors in such a way as to get good even lighting with minimal reflections but I learned a lot through 'working the shot' and eventually got some shots I was happy with. Here are some shots of the setup so you can get an idea of how it came together:


I love the ball head style umbrella swivels because they allow me to tip my speedlites into a vertical orientation.   


Check out my high-tech flags!


Conclusion

Overall I was very pleased with my results and my learning experience from this shoot. Throughout the process I made notes on some of the limitations of my setup as well as some different techniques I might try next time, listed here so you can learn along with me:


  • Perhaps the biggest mistake I made was in not setting up the background far enough from my subject. This has  proven to be a recurring lesson in all of my high-key shoots. Because the subject was so close to the background I was managing a complex relationship of interdependent background and subject lighting that proved to be very ineffective. When the background is far behind the subject I can blast the crap out of it with the strobes on high power without affecting the subject substantially. Next time I'll either use  along table or separate the product table and background entirely so I can work the lighting for each independently. 
  • Next time I'm going to do a product shoot where the camera sits on a tripod and seldom moves I'm going to shoot tethered so I can compose and review the photos on my Macbook instead of the LCD on the camera. The camera's LCD, though excellent for what it is, is very limited in being able to display fine detail unless zoomed in to inspect the image section by section. In this case the old axiom rights true; everything looks good on the back LCD. After uploading my photos I saw many things that I might have corrected had I been able to see them, which leads me to my next point:
  • When shooting macro for Pete's sake wash, polish, clean, lint-roll and otherwise tidy up the items as much as possible before the shoot. To the naked eye the products seemed pretty good but the macro lens sees all and I was surprised when reviewing my images at how rough some of the items looked.


I hope you enjoyed my run-though of this photo shoot. Please post your own ideas and suggestions in the comments so we can all evolve our product shots. Below you will find some of the images from the shoot. Enjoy!


Images


Sources:

1. Cleghorn, M. (2004). Portrait photography: Secrets of posing and lighting. New York: Lark Books.

Sunday, January 25, 2015

An Overview of My First Studio-Style Photoshoot


Better grab something to drink and use the washroom before you sit down since this is a long one.

In an alternate reality I work in the entertainment business in Toronto and I have a lot of friends who are DJs and producers. Since most are egotistical photo-whores in need of images for promotional material, I found myself with a bevy of willing subjects when I decided  I had learned enough about lighting to attempt a studio-style photo shoot. I often toss around photography ideas with another friend and entertainment industry colleague I call Dylan, who happens to also be a photographer, and not long ago, we decided to put in together and plan a shoot. Though Toronto has a multitude of surprisingly cheap photo studios for rent (search on your favourite local classified site or Vistek's website if you're in Canada) I managed to convince an organization I work with to allow me to use their warehouse as an impromptu photo studio. I chose to go this route because it didn't cost me anything and it, being an audio/visual production warehouse, is full cool goodies I could use for our shoot. So it was that with much excitement we planned and executed our photo shoot, my experience of which I will share with you in the hopes it will inspire you to attempt something similar while avoiding some of the mistakes I made. It was an excellent learning experience and tons of fun in the doing. Many people might not be so lucky as to have access to such an ideal space but, as the Internet will tell you, the same results can be replicated with a modest space and a trip to the local hardware store and fabric store.

I built the confidence to attempt such a shoot by watching videos on flash photography on Lynda.com and reading the (you guessed it) Strobist blog. I found the course Fundamentals of Flash Photography with Ben Long as well as David Hobby's videos on Lynda.com exceptional in clarifying key concepts and demonstrating basic technique and how to 'work the shot' with strobes. If you have access to Lynda.com I would highly suggest both resources if you're interested in learning how to use strobes in your photography. The Strobist blog is also and excellent resource and David Hobby is both funny and pragmatic in his writing. Convinced of my new found strobe-God powers I decided that the only option at this point was to endeavour a high key style shoot so as to put as much of my learning as possible to use.


Planning

Those who know me might tell you I'm well prepared. If so, they're being very moderate because I'm a bit of a planning nut. I have a list, chart, spreadsheet or similar tool organizing almost every aspect of my life and I find great pleasure and calm in creating and maintaining those lists. That trait served me very well when it came to organizing a shoot since I had zero experience to reply on. In order to put together my plan I read several dozen online articles on the subject and noted the following functional areas I judged important to prepare for:

  • A look and concept
  • The models, their appearance, clothing and accessories 
  • The space, equipment, and setup
  • Posing and direction
  • Post production, delivery and use of the photos

My first order of business was booking some models. As I mentioned earlier I was flush with volunteers and easily able to book a full day's worth of talent to shoot. This was my first mistake. Inspired and overconfident from watching all these pros work in online videos I booked myself a few hours with each model which proved to be insufficient. Being an utter newb I was making everything up on the fly and didn't have the skill building a rapport with or directing the model that is necessary to get good shots in a timely fashion. By the time I had got into a groove with one model my time was over with him and I had to move on. The full day of shooting I had arranged proved to be very taxing and I found myself a little worn out and getting frustrated near the end. Next time I'll limit myself to a single model and a shorter session.

After securing some models I began to contemplate what look I was going for and for what purpose the images will be used. I had mostly DJs coming, for which I envisioned dramatic lighting styles to evoke their outrageous musical styles and personalities in promotional material. I also had one professional coming for whom I wanted to do flat beauty-style lighting for a LinkedIn profile picture. Conventional wisdom would have that one should plan a look and concept and then find models to suit the look but when you are trying to shoot people volunteering their time you work with what you have.

With models secured and a loose concept in mind I began to bend my thoughts on how to prepare my models for the shoot. I use the terms 'model' and 'talent' loosely as none of these folks had any experience in front of the camera and would, I knew, require substantial preparation and direction. After spending considerable time thinking and reading on how to prepare them, I devised and sent to each the following checklist:

  • Bring a few outfits, hopefully somewhat dissimilar.
  • Iron, steam, lint brush and otherwise prep your cloths.
  • Bring lots of different accessories (hat, sunglasses, necklaces, rings, etc...)
  • Bring a few props that are demonstrative of or iconic in reference to your work. 
  • Bring a few pairs of shoes and clean/shine them up.
  • Do your hair and bring extra product and brushes or combs in case you need to redo or touch it up.
  • Don't forget to shave, trim, or otherwise tame your facial hair. 

I thought I had covered most of my bases but in fact I had forgotten some critical items that became quite obvious to me during the shoot and later during post processing. In light of what I consider my second mistake I added the following to my checklist:

  • Apply quality chapstick starting the night before. Trying to retouch heavily chapped lips in post isn't very easy.
  • Wash the bottom of the shoes you plan to wear for the shoot and don't wear them to the shoot. Dirty shoes mark up the white seamless very fast (more on this later). 

Having no experience and only some knowledge on posing, I watched many videos and downloaded many posing cheat-sheets on my iPad which I intended to reference during the shoot. This was a great idea as I found myself looking at the guide periodically for ideas. I only wish that I would have studied them in depth beforehand and perhaps pre-selected some poses so as not to have to break my report with the talent so often to look in the guide. Every time I stopped to look something up I found it interrupted the cooperative development of the concept between the talent and I. Something to be aware of.

Being friends with my models I wasn't overly concerned with formalizing the terms of the shoot. I knew how they intended to use the images and I made it clear they were getting the free photo shoot with the understanding that: a) it was a learning process so they had to keep their expectations in check and, b) I was going to use the images in my portfolio, blogs, social media and other outlets to promote myself and them. All concerned were very happy with the arrangement. From all my readings on the matter I would highly recommend not going about it that way and having more formal agreements. Something else to think about since your mileage may vary. I also made it very clear that I will be dragging my butt considerably with respect to the post processing since I am generally very short on time and I am also learning how to post-process in LR and PS so the going will be extra slow. Given the price they were paying and considering our friendship, again, they were more than happy.

Gratuitous camera porn. Notice my highly professional duct tape snoot. 
As for equipment, I resolved that I needed a backdrop, lighting and of course cameras and lenses. The cameras and lenses were the easy part. I charged up all my cameras' cells, cleaned my equipment and placed it in carry bags so as to be ready to go. I won't tire you with a complete list but Dylan and I together brought a few zooms and a variety of primes to cover focal lengths between 24 and 300mm and since we both shoot Canon we could share lenses on the shoot. Dylan was kind enough to bring a tripod.

To light the shoot Dylan and I brought a collection of five strobes, two 430EXIIs and three manual flashes of different brands that I have bought second hand on the cheap. The three manual flashes contained optical triggers which I consider absolutely essential for off camera flash so as to cut down on the requirement for triggering devices. I had a few sets of cheap Cactus V2 triggers and transmitters so that Dylan and I could both fire the Canons which would in turn fire the other strobes. To hoist the flashes I brought three stands with ball head umbrella swivels, an old cheapo tripod and my Gorillapod Focus along with tripod adapter feet to mate flashes to the tripods. Four saddlebag style sandbag came along to anchor the stands down. To diffuse and shape the light I had a few shoot-through umbrellas of different sizes and some snoots and other shaping devices I fashioned from cardboard for the price of some duct tape and some old boxes. The night before I charged up all my rechargeable NiMH AAAs and AAs. For Pete's sake don't use disposables save for backup unless you have to. They wear out faster, provide slower cycle times for the flashes and most importantly they're bad for the environment. Don't do it!

The backdrop we settled on was a roll of white seamless paper 10 feet wide. This width turned out to be ideal since we wanted to get some wider angle shots which the size did allowed. This was probably the most expensive part of the shoot at around $75 and, sad to say, there's no way to get around the expense.  I do  consider the purchase a good value since the roll is 36' and we will only need to consume about 6 feet so we will be able to use it a few times. If you go this route don't forget to bring scissors to trim the paper. To hold the backdrop in place and anchor it when it wasn't on the floor I purchased half a dozen A clamps on sale from the Home Depot. These particular ones are well weighted and almost completely rubberized and so worked splendidly for our purpose and didn't mark the paper at all. It's also worth mentioning we had a sturdy ladder to get up over our models for high angle shots.


Not knowing exactly what to expect I envisioned setting it all up according to the following diagram:


The Setup

An audiovisual production warehouse makes for an exceptional studio with high ceilings and a flat concrete floor. As I mentioned, our backdrop was a roll of seamless paper so we were going to need a backdrop stand which was a problem because neither Dylan or I owned a backdrop stand. We ended up rigging one up from some heavy duty production lighting stands and drape piping that was lying around. We set up black drape runs on either side perpendicular to the backdrop in order to block stray reflections from the orange shelves and metallic cases stacked along the walls. To illuminate the backdrop two of the strobes were mounted and turned 90 degrees, one on a ball head swivel and another on the cheap tripod with a three-way head, and aimed towards the opposite side of the paper. Doing so allowed for better coverage of the backdrop since the strobes output a rectangular beam. Each was also outfitted with one of my home-brew flags to block the light from the backdrop strobes from illuminating the model.


X marks the spot.
Our key and fill lights consisted of two strobes on stands with white shoot-through umbrellas. I planned to use a fifth strobe as a rim light or to illuminate the portion of the paper on the floor for shots in which it was to be pictured but one of our strobes, an old Vivitar H285HV,  didn't work with our cheap triggers. After trying to troubleshoot it for a short while we judged that the cheap triggers didn't output enough trigger voltage to set it off. Word to the wise for anyone planning to use this strobe for off camera flash setups. Needless to say it was up for sale on Kijiji the following day. I also brought two white foam-core boards to serve as reflectors. I didn't use them at all during the shoot but that because not only did I not know what to do with them but also I had put them down in a corner and forgot about them. While we were setting up and testing as well as for part of the shoot we had the paper only rolled down partially and weighted down with some of the A clamps so as to avoid the model walking on it when before it was necessary. We test fired the lights many times in order to set our exposure correctly and then taped an 'X' on the floor where we found was the furthest point where there was no light spill on the the model from the backdrop lights. One mistake we made was not using our camera's highlight warning to asses the blowout of the background. We sort of eyeballed it until it looked good on the camera LCD but, as you may have guessed, that wasn't the way it worked out when we review the images for editing. We had different tones across the background and shadows in some places where the flashes didn't cover as well. Satisfied with our test shots, we began to get down to business.


Shoot

Shooting with two photographers was a great experience for a first time shoot since neither of us felt the sole pressure of running the shoot and keeping the flow going. It's always nice to have someone to turn to and say 'what do you think' or to take over the attention of the model. Sometimes I really enjoyed an idea Dylan explored and sometimes I didn't see what he saw in which case I stepped back and he took the lead which gave me time to regroup and think of my next move. I do wish I had more poses and variations in mind. It's much harder to find info on posing man than on posing women. I've checked our many books and online articles and I could really use some suggestions if someone can send them my way.

We were able to experiment with many different angles with the lighting, raising and lowering the key light and moving it from side to side. Moving the stands with the lights raised and the umbrella out was very awkward and slightly unstable, causing the light to wiggle around on top of the stand. This wouldn't be a problem if the lights were installed tightly but the shoes on the cheap triggers are not well suited to the Canon locking mechanism and so the flash sits loosely on the shoe. At one point in the shoot I was moving an umbrella and the stand shook enough to pop one of the flashes off the shoe and drop it  to the floor. My reflexes were almost fast enough to catch it and I got a piece of it on the way down which slowed it considerably but my 430EXII hit the deck pretty hard. I was shocked when I picked it back up only to find that it was working perfectly after falling from about nine feet. My opinion of the build quality of the unit went up considerably to say the least. In the future I will be applying a bit of gaffer tape to the shoes to firm it up. I felt I should have also lowered the light when I was moving it but since I didn't know what I was doing I was moving the lights around a lot experimenting and that would have slowed me down too much.

Taking a little break from the shoot to take some fun snapshots.
 Our models were very cooperative and did their best to give us a variety of looks. We took breaks every so often to chit chat and discuss poses and looks which gave us a much needed break from the physical strain. Between each break Dylan and I loaded our images on to our respective computers so we each had copies which served as backup as well. We discussed shooting tethered so we could more clearly see the results but we decided it would be too cumbersome and perhaps even dangerous with two shooters constantly criss-crossing each other.


One thing that quickly became apparent to me as I was shooting was that I had spent a lot of time focusing on my models' cloths and little on mine. I would highly suggest taking some time to consider comfortable cloths when shooting. The jeans I wore were not the most comfortable and my sweater was a little too hot, each frustrating and distracting me.

When I was working close up with some of my primes I was focusing with the centre AF point and then recomposing. Later when I checked my images some were noticeably softer in the face than I would have liked. I've used this technique with good success before but I will try and do so with the closest AF point available to minimize this potential error.


Conclusions

Though I didn't walk away with as many keepers as I would have liked, I learned a lot and gained some much needed experience on the shoot. My friends were happy and I continue to slowly trickle images to them as I get the time to develop them. Perhaps more import is that I got a sense of some of the things I really need to work on in order to be more effective in both planning and execution my next shoot.

Below I've posted some of my favourites from the shoot. Let me know what you think. If you would like to see high resolutions versions with the EXIF data and setting used please check out my Flickr page where all of the images are hosted.


Images